
Managing guest lists is one of the most time-consuming parts of event planning.
Guest names arrive from multiple sources. RSVP responses come through different channels. Dietary requirements get buried in email threads. Before long, planners are juggling spreadsheets, notes, and messages just to keep track of who's attending.
That's why we built Guest Management and RSVP Tracking directly into Coorda.
In this guide, we'll walk through the complete process from adding guests to collecting RSVP responses.
Step 1: Add Your Guests
Start by opening the Guest List section within your event.
There are two ways to build your guest list:
Option A: Add Guests Manually
Click Add Guest and enter:
First name
Last name
Email address
Phone number
RSVP status
Guest group
Party size
Meal preference
Dietary requirements
Internal notes
This works well for smaller events or when adding guests individually.
Option B: Import Guests from CSV
For larger events, use Import Guests.
Simply:
Download the CSV template
Add your guest information
Upload the completed file
Coorda automatically imports your guests and prepares them for RSVP tracking.
This can save hours when working with large guest lists.
Step 2: Organize Guests Into Groups
Not every guest should be treated the same.
Use Guest Groups to organize attendees such as:
Family
Friends
Wedding Party
VIP Guests
Vendors
Corporate Attendees
Grouping guests makes filtering, reporting, and seating assignments significantly easier later in the planning process.
Step 3: Configure RSVP Settings
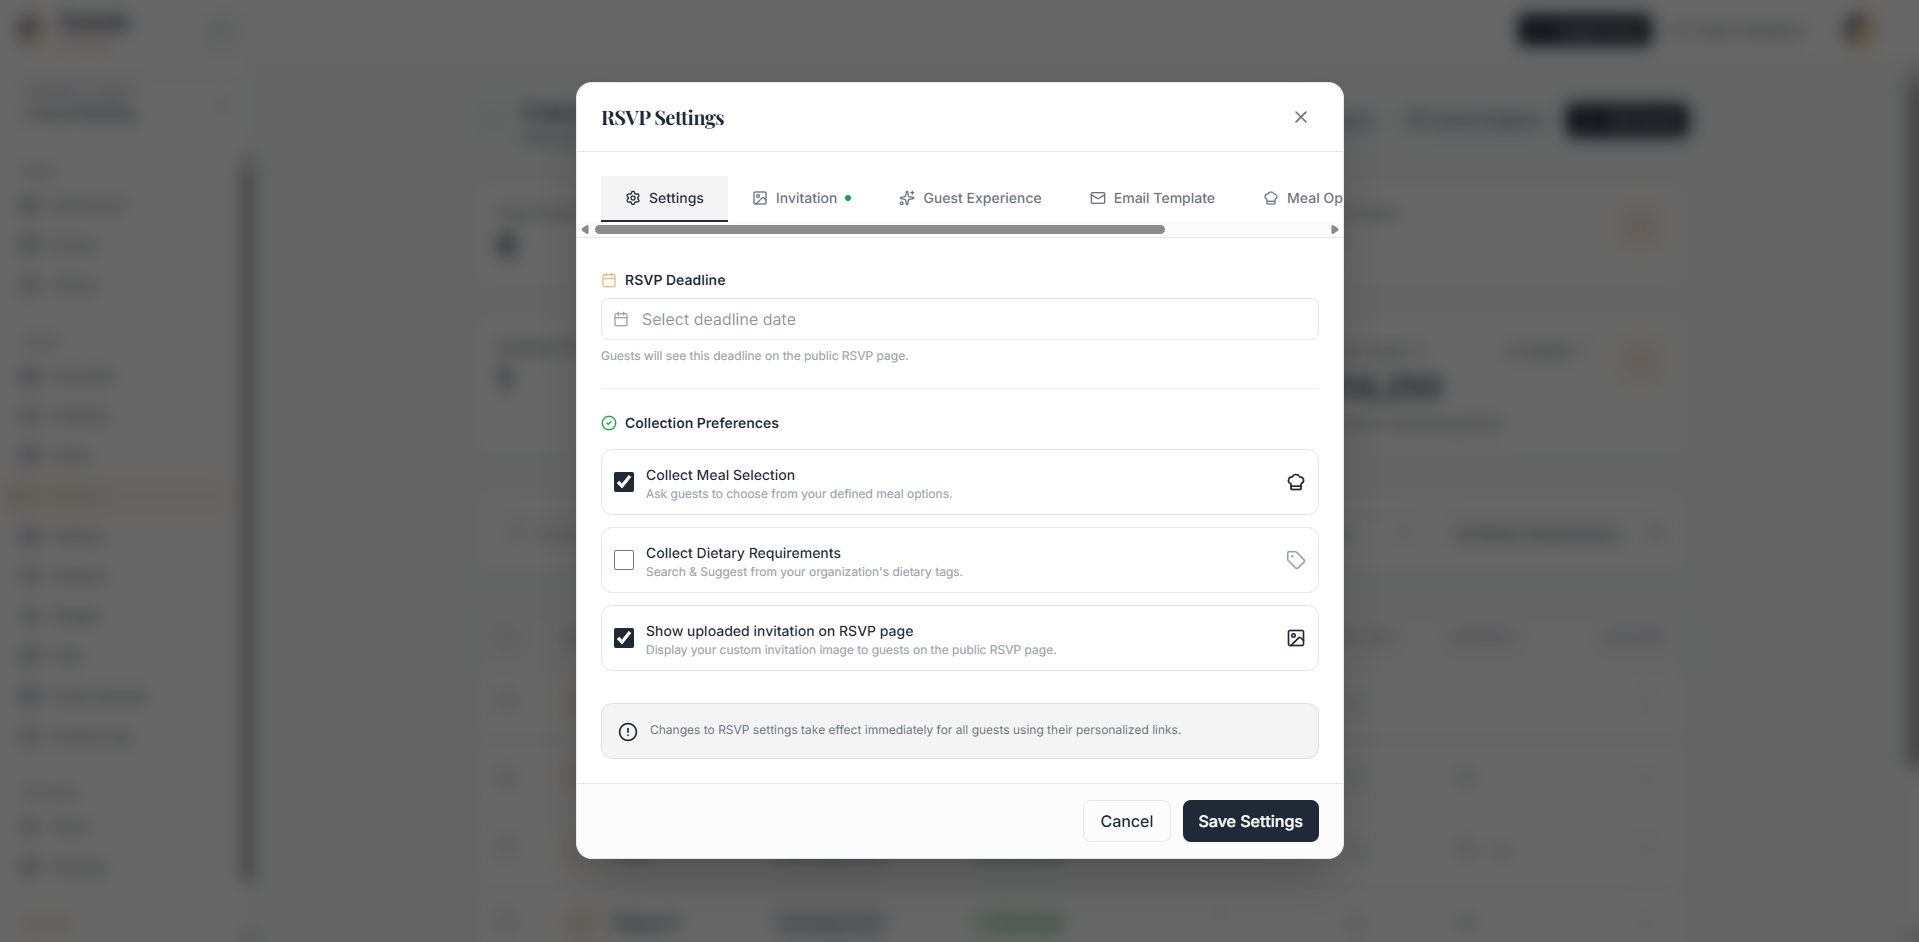
Before sending invitations, customize the RSVP experience.
Open RSVP Settings and configure:
RSVP Deadline: Set a response deadline so guests know when to confirm attendance.
Meal Selection Collection: Allow guests to choose their preferred meal option.
Examples:
Chicken
Fish
Vegetarian
Vegan
Custom menu options
Dietary Requirements: Collect important dietary information such as:
Vegetarian
Vegan
Gluten-Free
Nut Allergy
Dairy-Free
Having this information centralized helps planners and caterers avoid last-minute surprises.
Step 4: Upload Your Invitation Design

Want a more personalized guest experience?
Upload your event invitation directly into Coorda.
Your invitation will appear on the RSVP page, allowing guests to view event details while submitting their response.
This creates a professional experience without requiring separate invitation websites.
Step 5: Share Your Story & Event Details
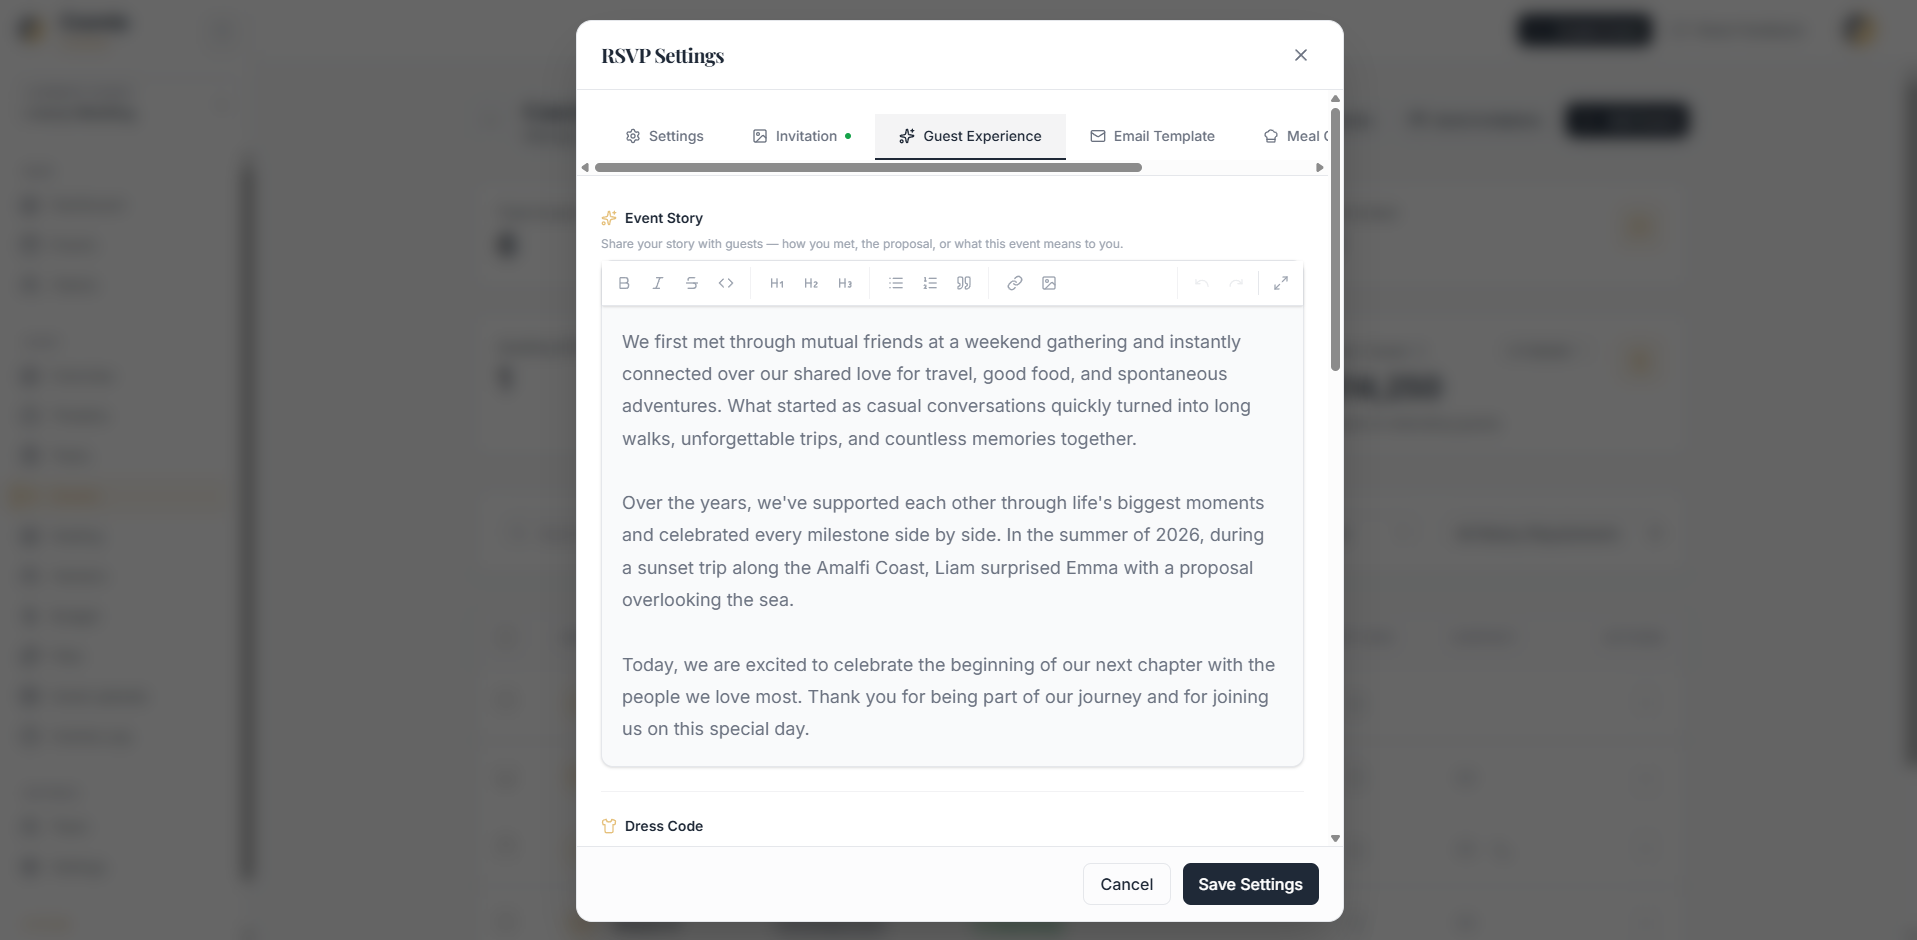
Every event has a story.
Using the Guest Experience section, planners can add:
Couple's story
Event details
Welcome message
Dress code information
Additional instructions
This helps guests feel connected before they even arrive at the event.
Step 6: Customize Your RSVP Email Template
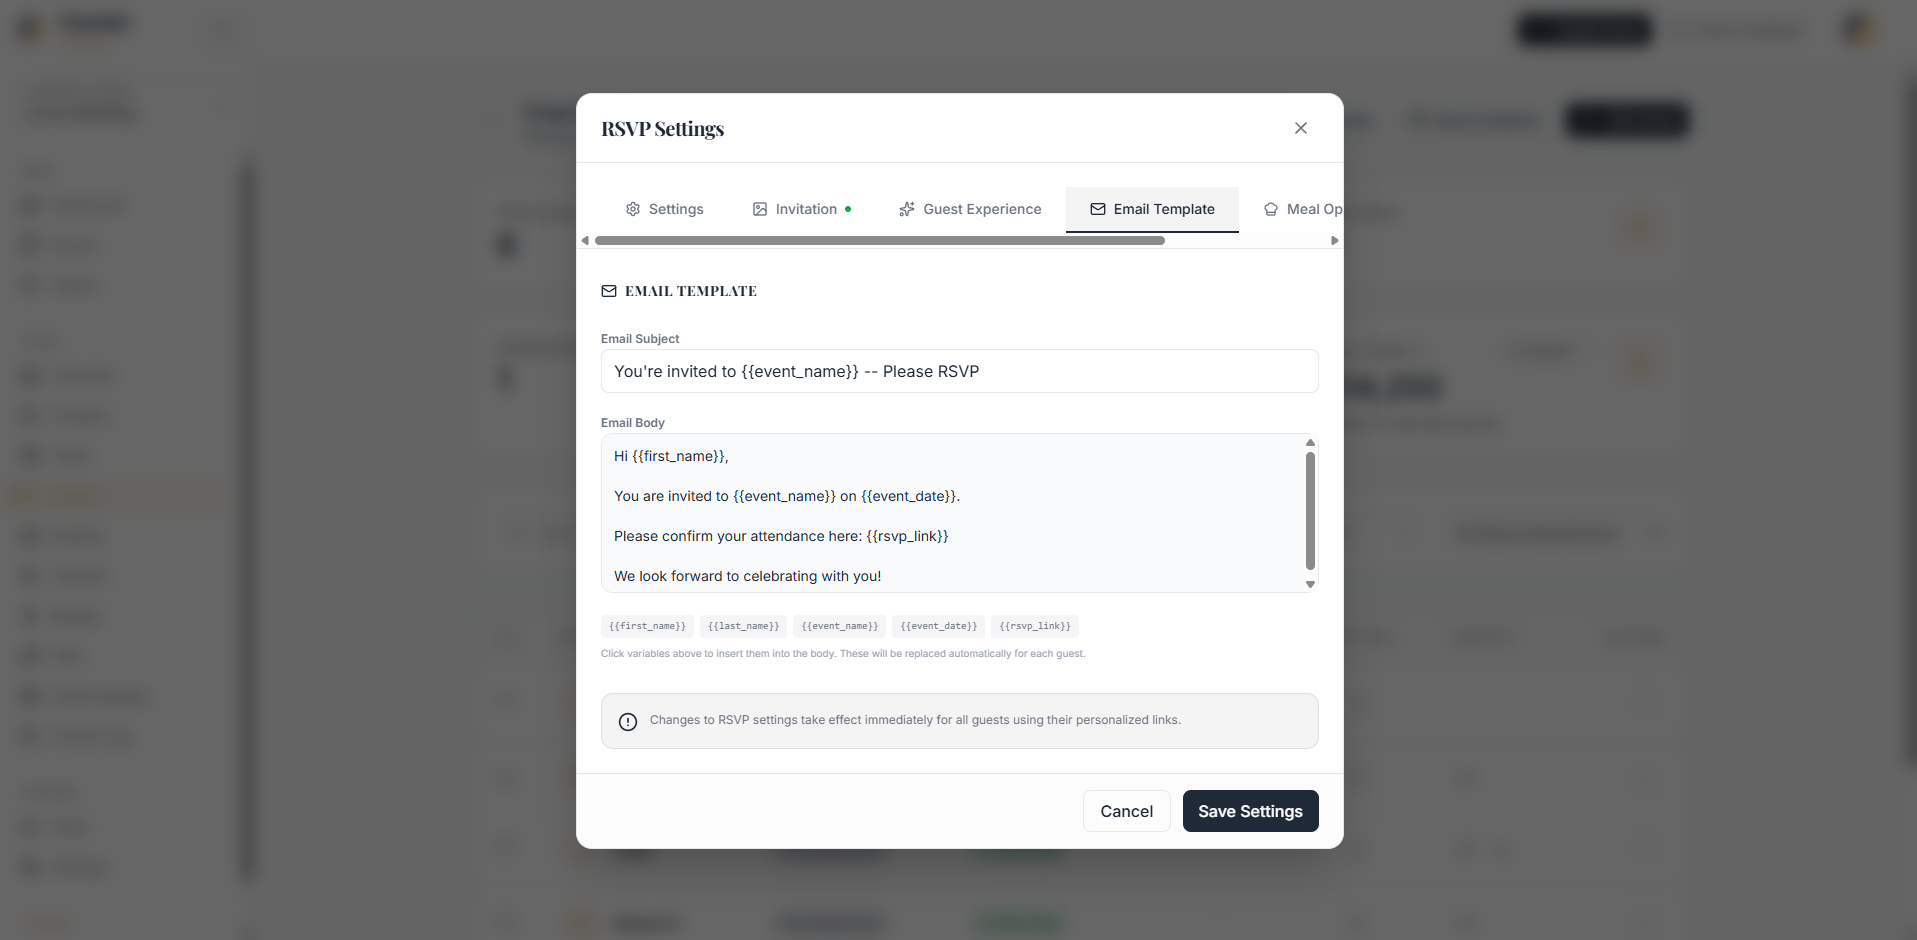
Coorda allows you to fully customize invitation emails.
Personalize:
Subject line
Email content
Guest messaging
Dynamic variables automatically populate information such as:
Guest name
Event name
Event date
RSVP link
Every guest receives their own personalized RSVP invitation.
Step 7: Send Invitations
Once everything is configured:
Click Send Invitations
Review the guest count
Confirm delivery
Coorda automatically sends personalized RSVP invitations to your guests.
No manual emails.
No copy-pasting links.
No tracking responses in spreadsheets.
Step 8: Track Responses in Real Time
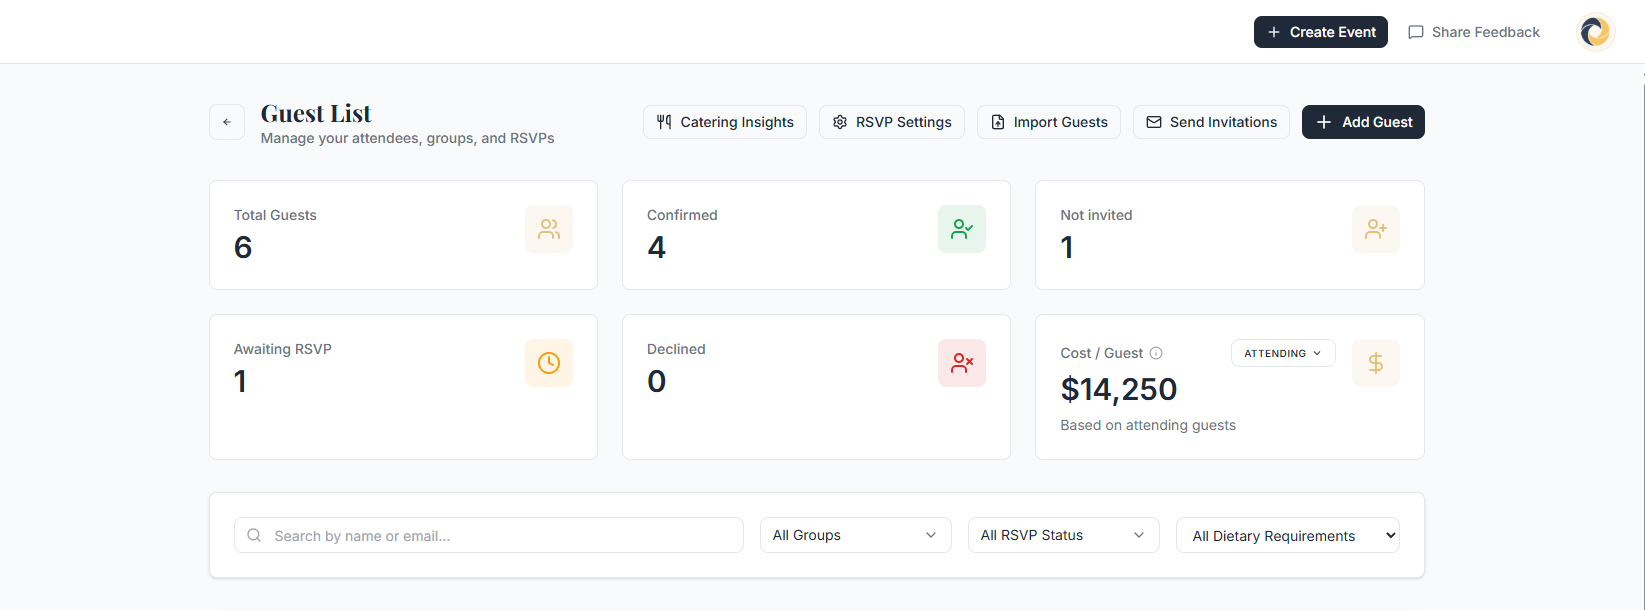
As guests respond, Coorda automatically updates:
Confirmed guests
Declined guests
Awaiting responses
Not invited guests
The dashboard gives planners an instant overview of attendance progress.
You'll always know:
Total guest count
Expected attendance
Outstanding responses
Cost per guest
without manually updating spreadsheets.
Step 9: Review Meal Choices & Dietary Requirements
As responses arrive, meal selections and dietary requirements are automatically attached to each guest profile.
This makes it easy to:
Generate catering reports
Confirm meal counts
Identify allergies
Share requirements with vendors
Everything stays organized in one place.
Step 10: Update Guests Anytime
Need to make changes?
Guest records can be updated at any time.
You can:
Edit guest information
Change RSVP status
Update meal selections
Add internal notes
Copy RSVP links
Remove guests
Coorda keeps everything synchronized automatically.
If you haven't explored Guest Management yet, this is a great feature to set up early in the planning process and benefit from throughout the event lifecycle.