One of the biggest challenges in event planning isn't finding vendors.
It's keeping track of everything after you've booked them.
Contracts, deposits, payment schedules, final balances, and budget updates can quickly become scattered across spreadsheets, emails, and notes.
That's why Coorda treats Budgets and Vendors as connected systems rather than separate tools.
When used together, they provide a real-time financial overview of your event while helping you manage every vendor relationship in one place.
Let's walk through the complete workflow.
Why Budgets and Vendors Work Better Together
In most planning workflows:
Vendor contracts live in one spreadsheet
Payments live in another
Budget tracking happens somewhere else
Actual costs are manually updated
This often leads to inaccurate budgets and missed payments.
In Coorda, vendor contracts can be linked directly to budget items.
When vendor information changes, your financial overview stays synchronized automatically.
Part 1: Managing Vendors
Step 1: Add Your Vendors
Navigate to the Vendors section within your event.
For each vendor, you can store:
Vendor name
Category
Primary contact
Email address
Phone number
Website
Contract details
Notes
Examples:
Venue
Catering
Photography
Entertainment
Florist
Hair & Makeup
Transportation
Everything remains attached to the event for easy access.
Step 2: Track Vendor Status
Each vendor can be assigned a status such as:
Prospect
Tentative / Hold
Confirmed
This helps planners quickly identify which services are secured and which still require attention.
At a glance, you'll always know where each vendor stands.
Step 3: Record Contract Values
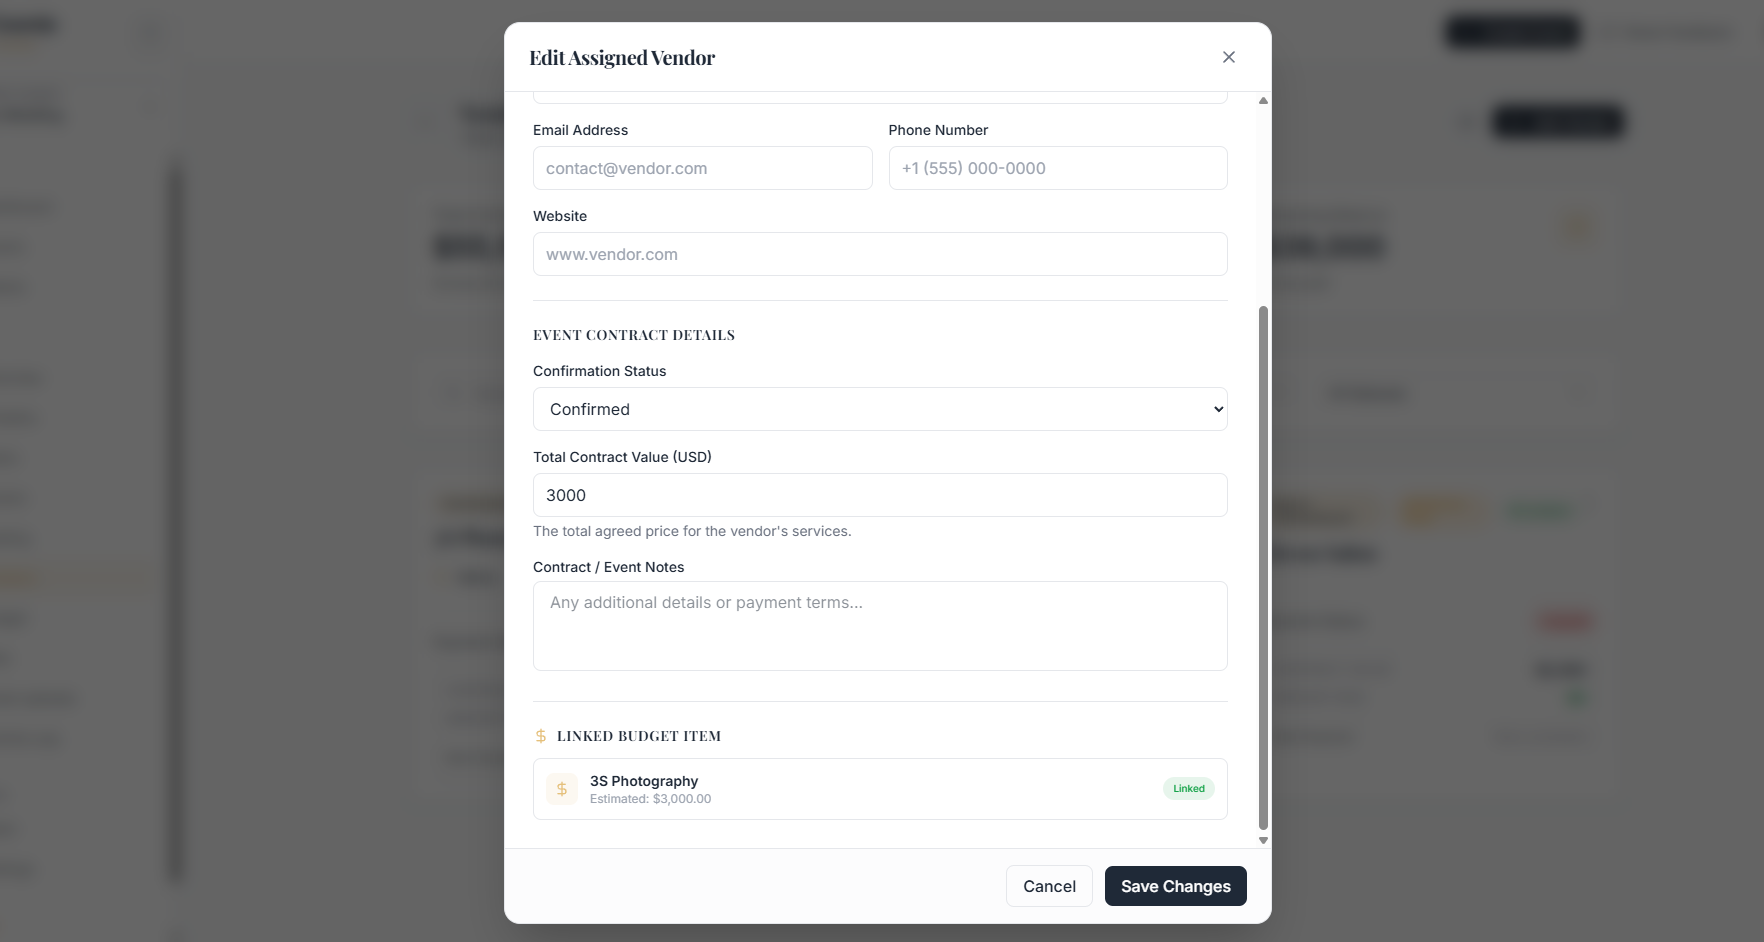
For confirmed vendors, enter:
Total contract value
Contract notes
Additional agreement details
Examples:
Payment terms
Deliverables
Special requirements
Package inclusions
This creates a centralized record that can be referenced throughout the planning process.
Step 4: Link Vendors to Your Budget
One of Coorda's most useful features is the ability to connect vendors directly to budget items.
When assigning a vendor, you can:
Create a New Budget Item
Example:
Vendor: Photography Company
Budget Item: Photography
Budget Category: Photography
The contract value automatically becomes the estimated budget amount.
Link to an Existing Budget Item
If you've already created a budget item, simply connect the vendor to it.
This keeps your budget and vendor records synchronized.
No duplicate data entry.
No manual calculations.
Step 5: Track Vendor Payments
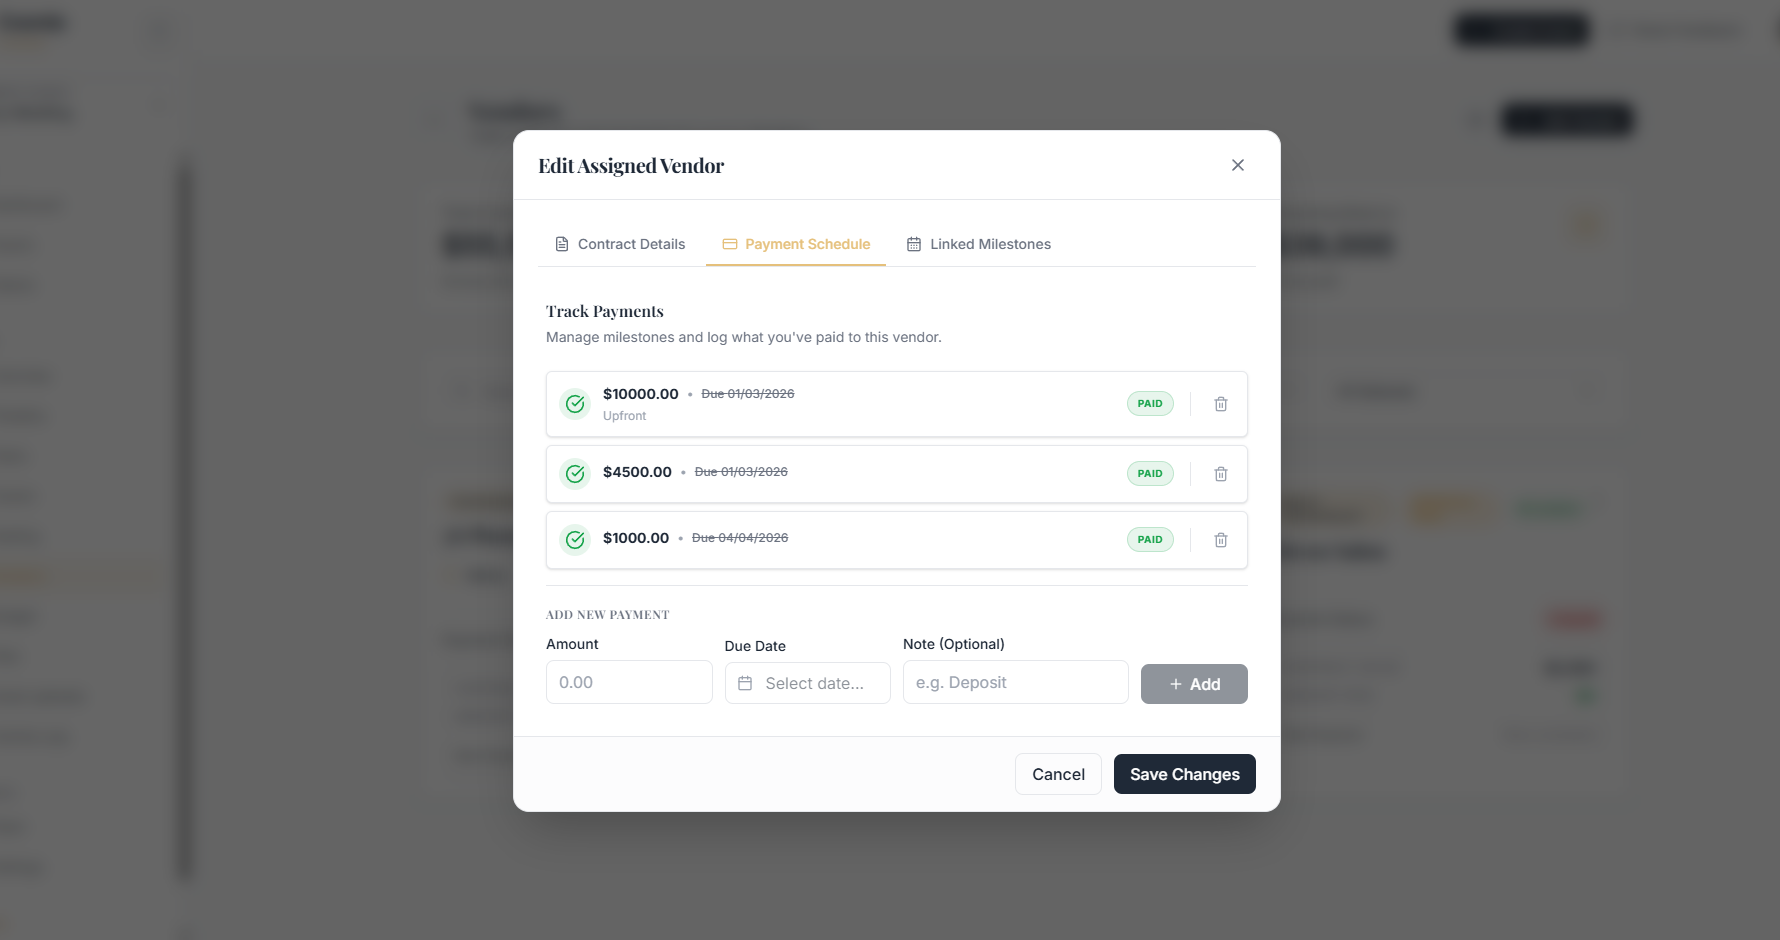
Open the vendor record and switch to the Payment Schedule tab.
For every payment you can track:
Amount
Due date
Notes
Payment status
Examples:
Deposit
$1,000
Due March 1
Second Payment
$2,000
Due June 1
Final Balance
$2,000
Due Event Week
As payments are marked paid, Coorda automatically updates financial totals.
Step 6: Link Vendors to Timeline Milestones
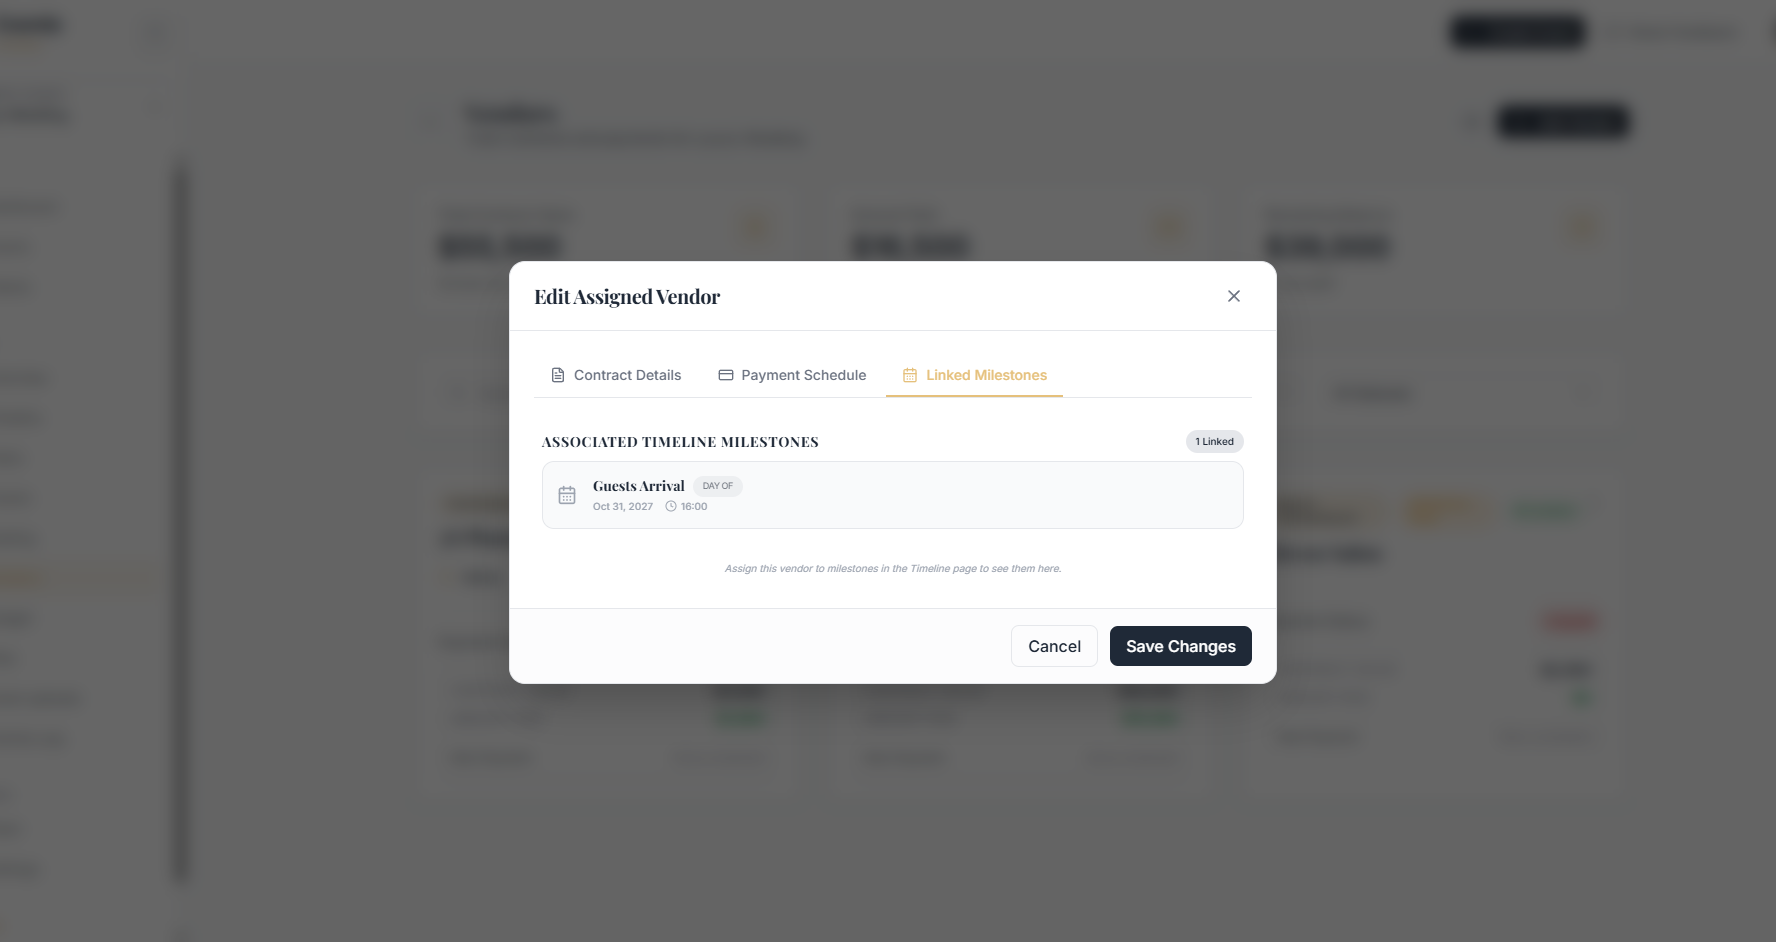
Vendors don't exist in isolation.
They're tied to important moments during the event.
Use the Linked Milestones section to connect vendors to timeline activities.
Examples:
Photographer Arrival
Ceremony Setup
Catering Setup
DJ Sound Check
Florist Delivery
This helps planners see exactly which vendors are responsible for which event activities.
Part 2: Managing Budgets
Step 7: Create Budget Categories
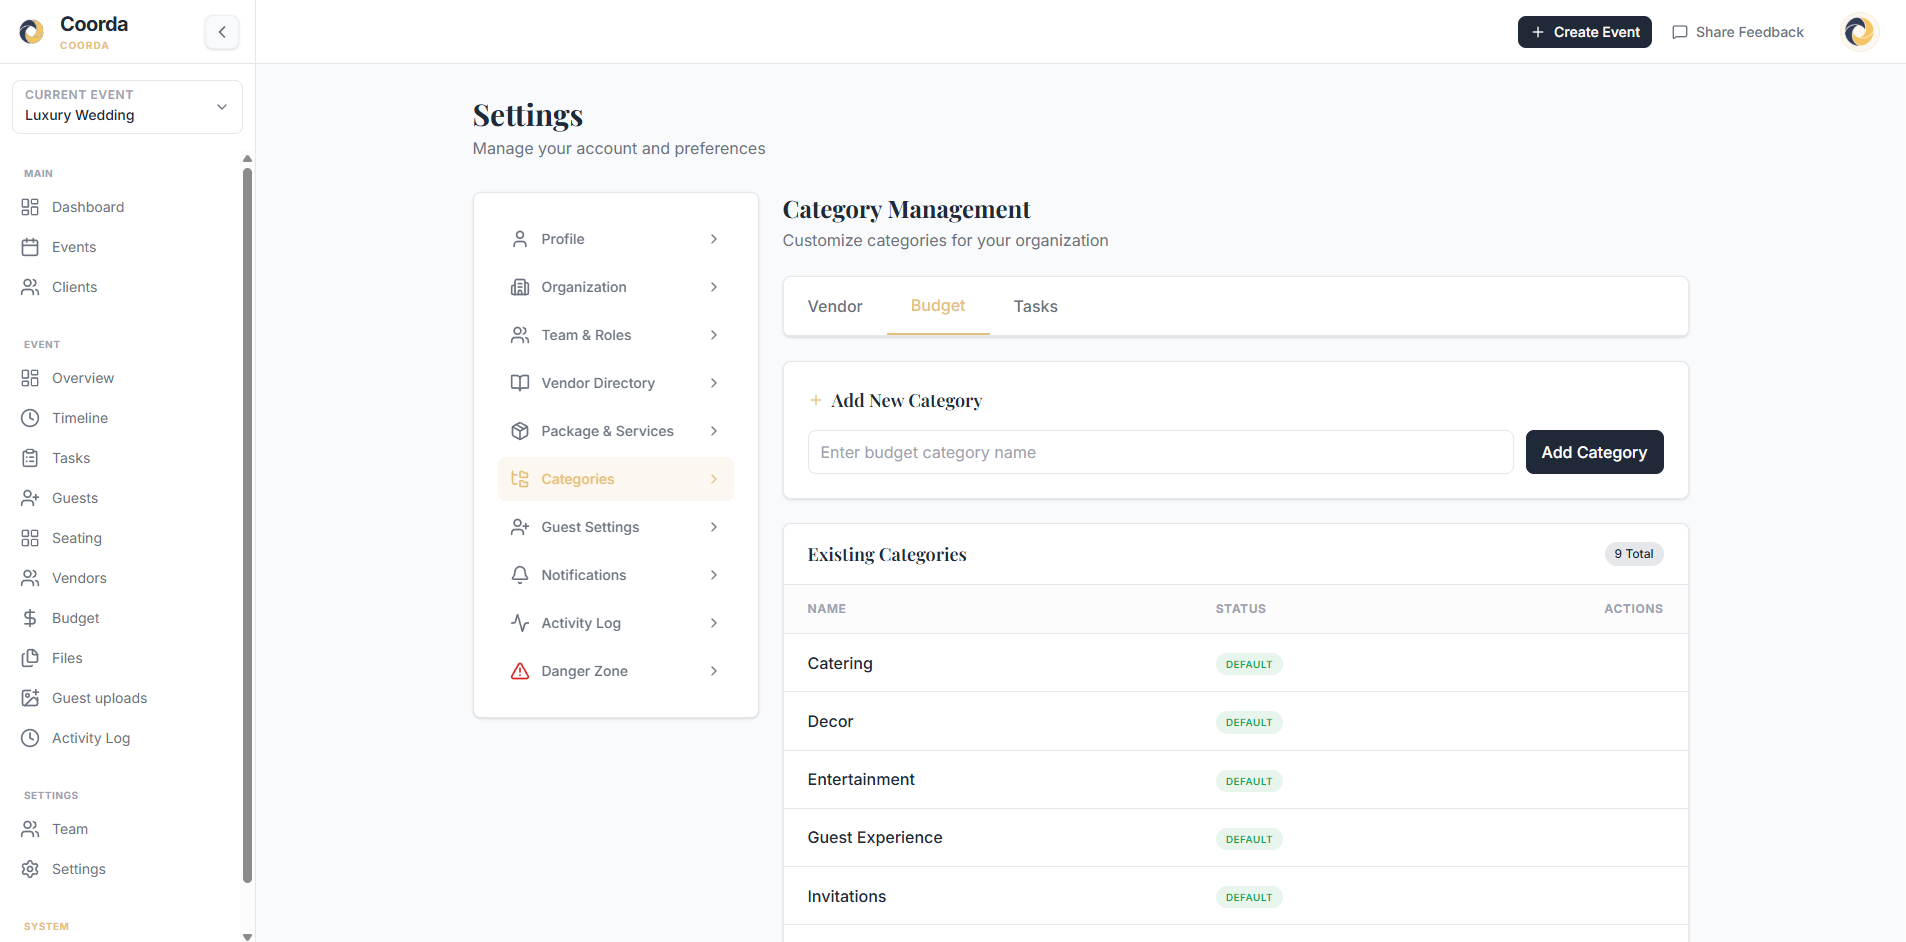
Before adding expenses, organize your budget into categories.
Examples:
Venue
Catering
Photography
Entertainment
Floral
Stationery
Transportation
Décor
Categories make reporting easier and provide a clearer financial overview.
Step 8: Add Budget Items
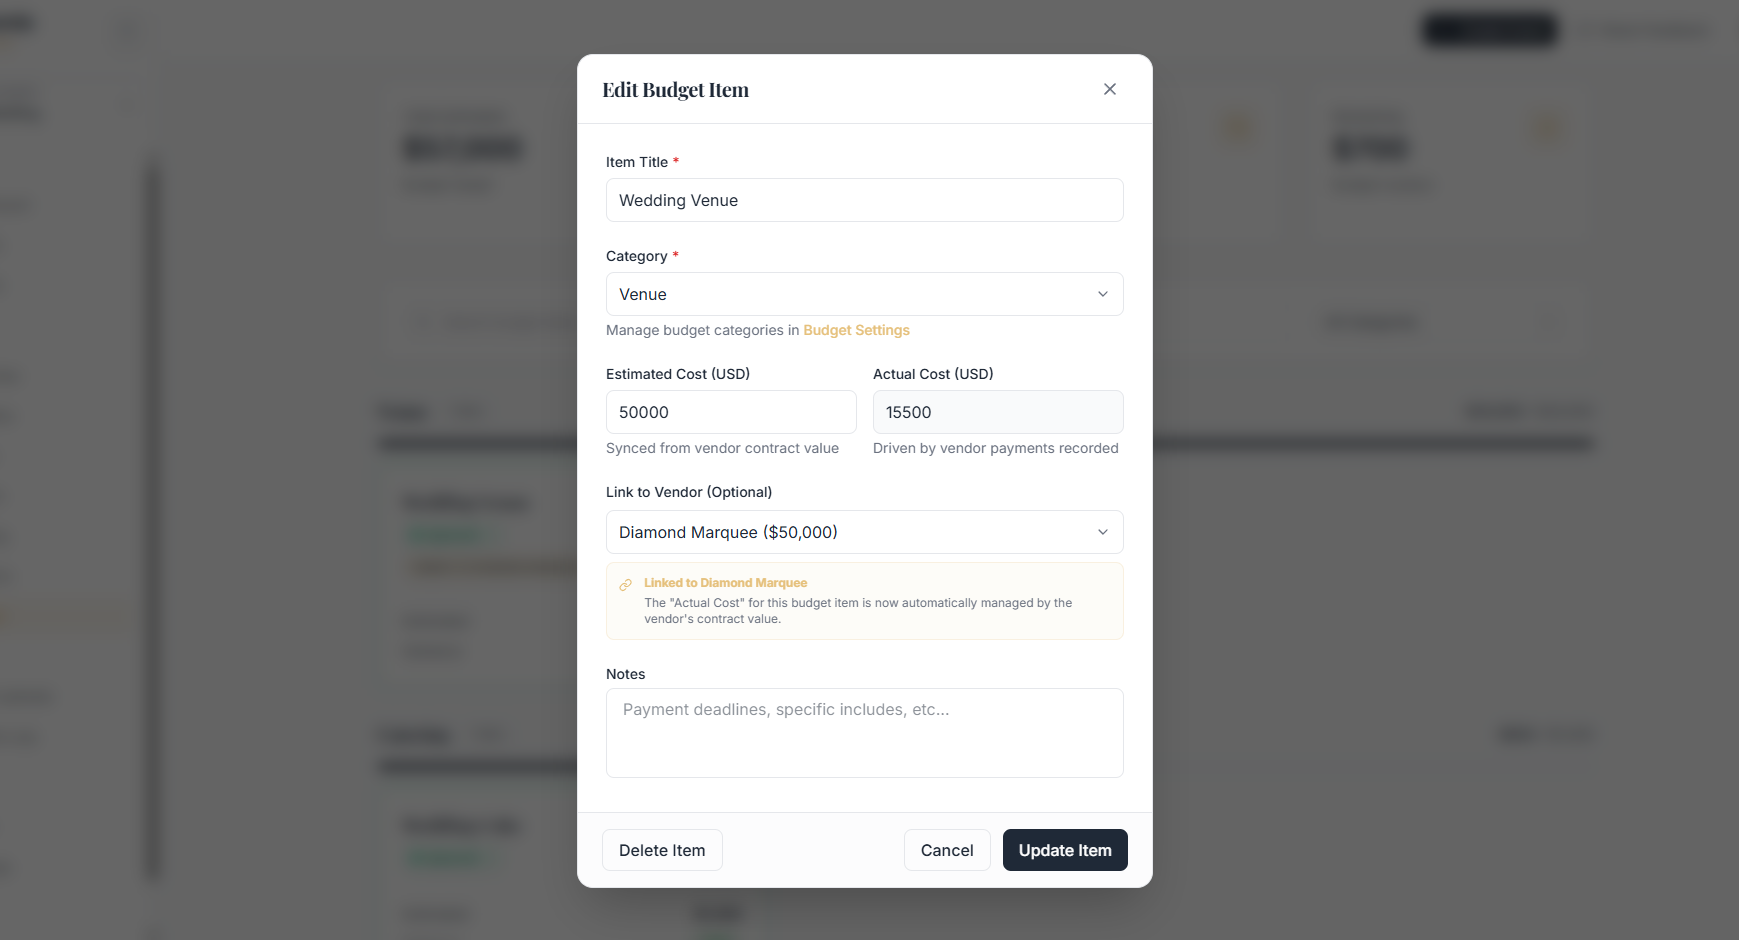
Inside each category, create individual budget items.
Examples:
Venue Category
Wedding Venue
Catering Category
Dinner Service
Wedding Cake
Beverage Package
Photography Category
Photographer
Videographer
Each item can include:
Estimated cost
Actual cost
Notes
Linked vendor
Step 9: Track Estimated vs Actual Costs
Budgeting isn't just about recording expenses.
It's about monitoring variance.
For every item, Coorda tracks:
Estimated Cost
Your target budget amount.
Example: $1,500
Actual Cost
What you're actually paying.
Example: $800
This instantly shows whether you're under or over budget.
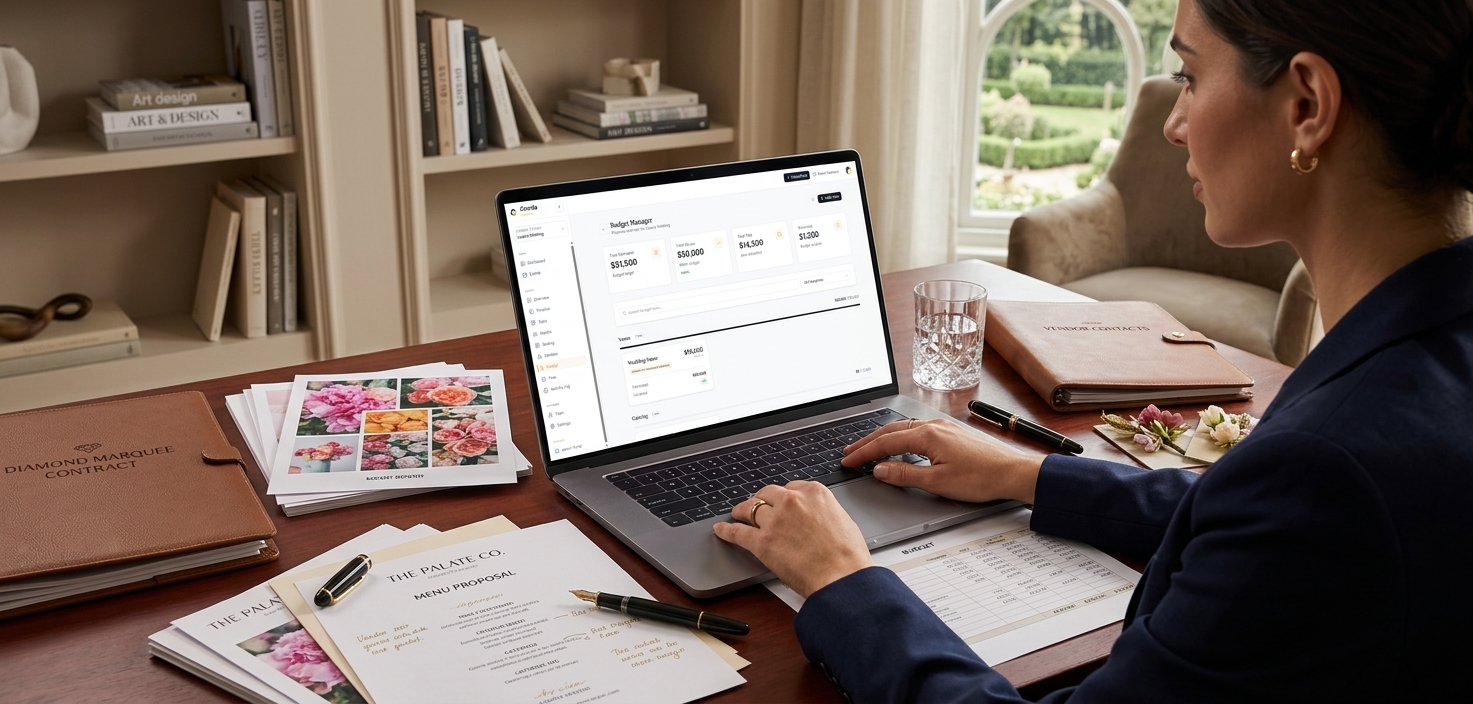
Step 10: Monitor Budget Performance
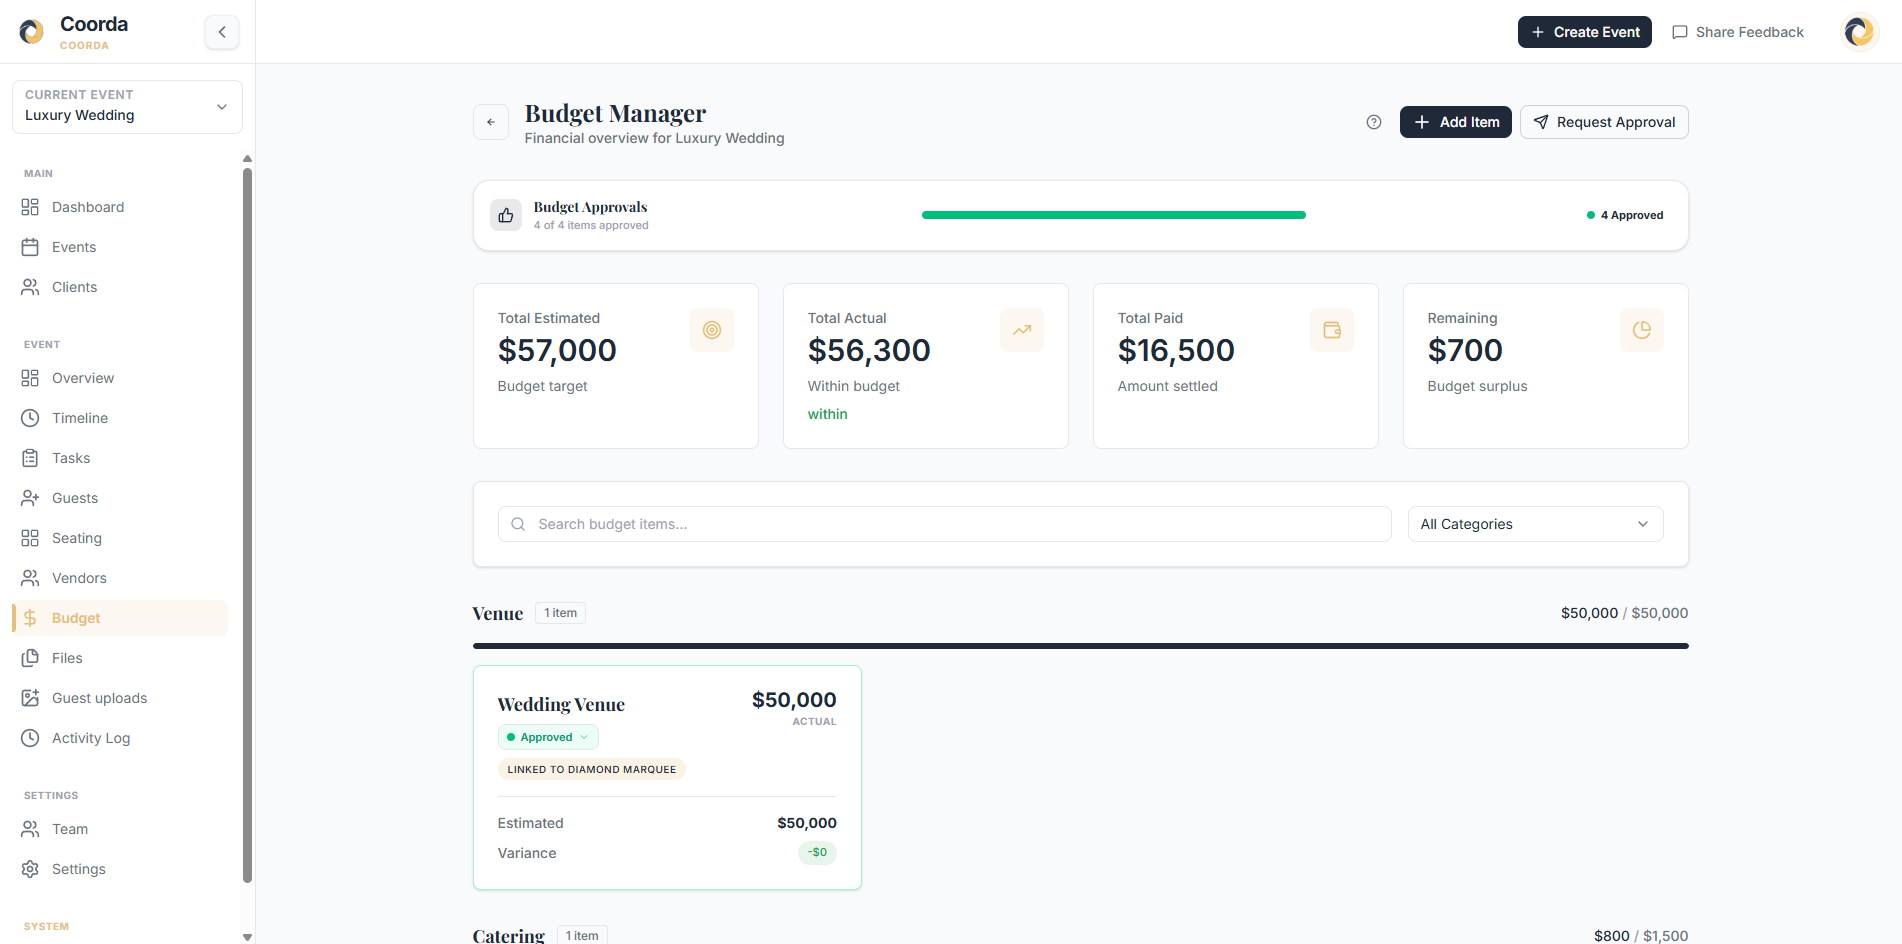
The Budget Dashboard provides a real-time overview of:
Total Estimated
Total Actual
Total Paid
Remaining Budget
Instead of calculating totals manually, planners can immediately see the financial health of the event.
This becomes especially valuable as budgets grow and multiple vendors are involved.
Step 11: Use Budget Approvals
Working with clients?
Budget items can be submitted for approval before spending decisions are finalized.
This creates a clear approval trail and reduces confusion around budget changes.
Benefits include:
Faster client decisions
Better transparency
Reduced disputes
Clear financial accountability
Real-World Example:
Imagine you're booking a wedding venue.
Vendor Record
Vendor: Diamond Marquee
Contract Value: $50,000
Status: Confirmed
Linked Budget Item
Category: Venue
Item: Wedding Venue
Estimated: $50,000
Payments
Deposit: $15,500 Paid
Remaining: $34,500
As payments are recorded, the budget automatically reflects the latest financial position.
No spreadsheet updates required.
Final Thoughts
Budgets and vendor management are at the heart of every successful event.
When contracts, payments, timelines, and financial tracking live in different places, mistakes become inevitable.
By bringing everything together, Coorda helps planners spend less time updating spreadsheets and more time creating exceptional events.
If you haven't explored the Budget and Vendor modules yet, this is one of the most powerful workflows available inside Coorda today.